Open post

Whisk vs. Blend Bubble Solution

Shear Tolerance and Its Applications in the Bubble Industry

A Tale of Four Polymers

In my lab, polymers are everywhere. I use them to make cosmetics and skincare products, and I use a whole other set when I’m working with bubble solutions. One debate that always comes up in the bubble world is whether or not to use power tools to mix your solution. Some bubble artists swear by stick blenders and drills, while others insist a simple whisk is best. I decided to run an experiment to see just how much shear tolerance matters.

In chemistry shear tolerance refers to a substance’s ability to withstand mixing at a high speed- like with a blender.  Some materials have excellent shear tolerance while others require a more delicate touch.

The Cosmetic Side

First, let’s talk about a polymer I use in skincare: sodium carbomer. If you’ve ever seen a crystal-clear aloe vera gel, there’s a good chance it was made with this polymer. Sodium carbomer is specially treated to disperse and thicken fairly quickly, but here’s the catch—it’s not shear tolerant. If you over-mix it even slightly the polymer chains break down, and you’ll never get the thickness you’re aiming for.

This makes sodium carbomer great for small-batch makers who stir by hand. But companies making 10,000-gallon vats of hand sanitizer? They use a different, industrial-grade form designed to withstand high-shear mixers without breaking down.

I also worked with a special xanthan gum that has been processed and treated to hydrate quickly under high shear. This is the opposite case—you need a stick blender to disperse it evenly. It thickens solutions almost instantly, making it perfect for applications where consistency and speed matter.

The Bubble Side

On the bubble front, I tested guar gum and Poly-ox WSR 301 (PEO). These are two polymers that bubble makers know well, but they behave very differently when it comes to mixing.

For the test, I dissolved 0.5 grams of each polymer in 250 mL of distilled water. Then I split each batch into two groups:

  • One mixed by hand with a whisk

  • One blended with a Cuisinart stick blender (a true high-shear mixer)

I let them all sit overnight and came back to see the results.

Guar Gum

The stick-blended guar gum was thicker and smoother compared to the whisked version. This makes sense—guar gum is widely used in food manufacturing, where industrial mixers spin at high RPMs. It’s generally designed to handle shear and actually seems to perform better under it.  Guar gum gets processed, and treated in multiple different ways depending on the application, but the label always reads “guar gum” so pick a brand, and a mixing method that you prefer, and go with it  If you have questions about your particular brand of guar reach out to the manufacturer.  They often publish technical data sheets that will answer most of your questions..

Neither version seemed to get much thicker overnight, but there did appear to be a slight change.

Poly-ox WSR 301 (PEO)

Here’s where things flipped. The stick-blended PEO sample was thin, watery, and a bit cloudy. The blender introduced a lot of air, which hurt film strength and made it feel less slippery. By contrast, the whisked version—while it initially had a big clump at the bottom where it had settled overnight—was easy to stir in later and ultimately formed a much better, more stable gel.  It’s interesting to note that the whisked version was thick within a few minutes, and didn’t seem to get much thicker overnight.

That lines up with what we know about PEO. It’s commonly used as the “comfort glide” strip on razors or in cement manufacturing, where its self-siphoning properties help promote smooth flow, and reduce air bubbles. Neither of those applications rely on high-shear mixing, and need to hydrate quickly.  You can’t really let concrete sit overnight, and expect to pour it smoothly the next morning.

The Takeaway

So, whisk or blend? The answer is: it depends on the polymer.

Our Big Bubble Blend uses both guar gum and PEO, and I always prepare it with a whisk. After seeing these results, I’m sticking with that method. If you’re just using guar, though, use whatever method works for you.  I don’t see much harm in using a drill, or a blender to mix guar gum into a bubble solution if that’s your only polymer.

The bigger lesson here is consistency. If you want reliable results—whether it’s skincare gels or bubble juice—you need to control as many variables as possible:

  • Same water

  • Same temperature

  • Same ingredients from the same suppliers

  • Same mixing method

  • (And yes, I even try to use the same measuring cups.)

Polymers may have their quirks, but if you keep doing what you’re doing, you’ll keep getting what you’re getting. In the world of bubbles, that consistency is what lets you turn a good day into a great show.

Open post

DIY Bubble Light Tables

Bubble light tables allow kids to explore basic bubble science concepts, or just have a great sensory play experience. I recommend putting the tables in a tray or on a towel to help cut-down on messes.

Materials:

  • Food storage containers from the Dollar Tree, or reusable take-out containers
  • Small waterproof lights- these lights from Amazon work great
  • Heavy Duty Aluminum Foil

Directions:

Line each container with aluminum foil- this helps make the light reflect better, and makes the container more “light proof” so only the top glows.

Just place a sheet of foil on top of the container, and then use another container to help push it down.

Trim the excess foil

Add the light.  I don’t tape or glue it down because I stack the containers, and lids separately for travel.

That’s it!  

I give each child wands, or foamers to make bubbles, and let them explore, and play independently, or you can do a more focused, and structured activity.  It can get messy- make sure you’re prepared to wipe-up any drips, or spills.

Open post

The Perfect Bubble Solution

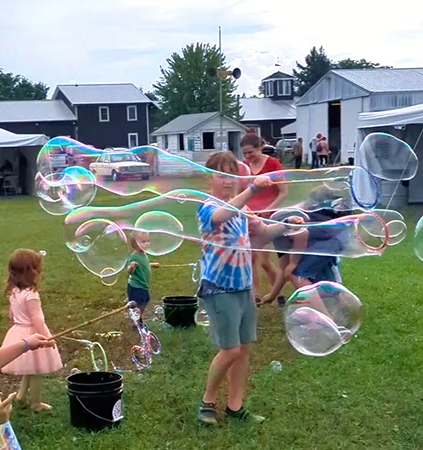
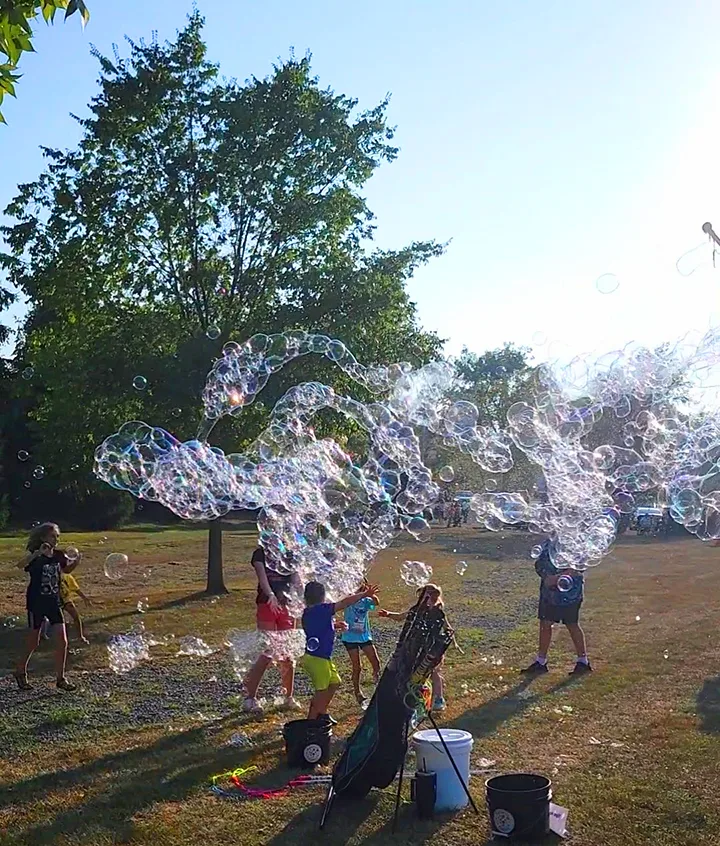
The Myth of the Perfect Bubble Solution

Every bubble artist — and every curious parent — has chased the idea of a “perfect bubble solution.” That magical mix that will create huge, shimmering bubbles every single time, no matter the conditions. The truth? It doesn’t exist.

There are plenty of great recipes out there, and most share the same basic ingredients: soap, water, and something to help the bubbles grow to huge proportions. But much like baking bread, it’s not just the recipe that matters — it’s the process, the conditions, and the care.

Bread is almost always flour, water, yeast, and salt. Yet hydration levels, the weather, and how the dough is kneaded or proofed can make one loaf airy and tender while another turns out dense. Bubbles are the same way. Humidity, temperature, wind, pollution, or pollen in the air, and even how the solution is mixed and stored all affect the results.

Different recipes work better for different applications. Outdoor solutions tend to be more robust, while indoor solutions focus on lightness and reliability for tricks. You might prefer adding a little glycerin if you live in a dry climate, or keeping things simple if humidity is on your side. There’s no single “right” answer — it’s about what works for you.

When I develop a product in my lab, I start with a “spec” — a list of exactly what I want the product to do. That’s how I approached Big Bubble Powder. I wanted something easy to mix, consistent, ready to use without waiting overnight, and capable of producing big, clear, beautiful bubbles. Could adjusting pH or using a different kind of polymer make a difference? Maybe — but there are so many factors at play, it’s impossible to control them all in search of the “perfect” mix.

I keep it simple so I can focus on the bubbles themselves, the kids, and putting on a great show. Because honestly, how you present the bubbles — and how you make your audience feel — is every bit as important, if not more, than the formula you use.

A few things I’ve learned along the way:

  • I don’t adjust for pH. It’s too easy to overdo and ruin a batch. My theory is that baking soda and citric acid combine to form sodium citrate, which softens water. Adding a pinch of sodium citrate (about ½ teaspoon per gallon) can make colors pop, but it also increases foam. Dawn Platinum already contains sodium citrate, so you can skip it if you’re using Platinum.
  • I don’t use glycerin or other humectants. I’ve tested everything from glycerin to expensive hyaluronic acid, and while they might give an extra second of hang time, wind and temperature have a much bigger impact on outdoor bubbles. If I lived in a drier climate, I might experiment more, but for most people, it’s not essential.

So instead of chasing the “perfect” formula, strive for consistency. Finding a formula, and a mixing method that you love, and then doing it the exact same way over, and over again is key. It lets you focus on the bigger picture, and making a great show. Play with the bubbles, find out what works best in certain conditions. Switch your gear to match the weather — on hot days, grab a garland or a net for more forgiving bubbles for example.

In the end, bubbles are as much an art as they are a science. The magic isn’t locked in a single, flawless recipe — it’s in your hands, your tools, your timing, and the joy you bring to the people watching

Open post

Pro Talk: Bubble Solution Safety

As a chemist I get asked about how long it’s safe to store mixed bubble solution, and the quick answer is that if you havent’t used a preservative, or sanitized everything it comes in contact with then it is safe to assume that your bubble solution going to age about as well as pizza left on the counter.  You’re probably OK with leaving it for a day or so, but I don’t recommend storing it much longer than that.

Bubble solution is essentually standing water at a relatively neutral pH, and any sort of standing water can be a breeding ground for funk.  Think about how gross a kiddie pool can get if you don’t change the water frequently.  

Legionella, and other bacteria thrive standing water, and outbreaks can be serious.  Don’t take unnecessary risks.

I haven’t heard of anyone getting sick from bubble solution, but because we deal with so much water, and kids, and other vulnerable populations  we need to be cautious.  

I know that we’ve all probably used bubble solution that has been around for a while, but we’ve also probably had some go bad sooner than expected too.  If I never smell rotten guar solution again it will be too soon! As a general rule I tend to mix it as needed, and don’t try to store it for any length of time.  It’s just safer, and less wasteful that way

Here’s how to keep your crowds safe this summer:
  • Use fresh bubble solution at every gig unless you’re taking a lot of precautions to ensure that you’re using good preservatives, and mixing it using “good manufacturing procedures”.  
  • Mix your solution as close to gig time as you can. 
  • Don’t pour used solution back into your batch if you make big batches.
  • Rinse, and/or sanitize your buckets, and mixing equipment frequently.  All of our buckets get rinsed thoroughly after every gig.  This helps keep your bubble gear in good shape.
  • You can use bleach, or other commercial sanitizers to sanitize buckets. Make sure you follow the instructions.
  • Let all of your strings dry between uses so they don’t develop a musty odor. 
  • Dispose of any unused solution down a drain after your gig.  
  • Keep your bubble solution as cool as you can, and try not to let it sit in a hot vehicle for too long.  Light-colored buckets help if it is very hot where you are bubbling.
  • If you are running stations on grass move the buckets around to avoid creating mud.
  • Don’t dump bubble solution on the ground.  It can harm the things that live in soil- like earthworms, and is a slipping hazard.
  • We also avoid calling it “juice” if there are a lot of small children around because I don’t want anyone trying to drink it.  It’s always “bubble solution” when we’re “in uniform”, and performing.
  • Do not leave children unattended around open buckets.
  • When in doubt throw it out!

Making safe bubbles is part of the reason I developed our Big Bubble Blend.  I wanted to be able to make as much, or as little bubble solution as needed for any occasion.   It’s designed to be mixed on-site, and ready to use right away. It was a labor of love that took years of fine-tuning to get just right. 

 It’s great for outdoor shows, and bubble stations.  It eliminates the guess-work of how much solution to bring to an event, the hassle of transporting that much liquid, having to dispose of unused solution, and ensures that everything is fresh, and safe!  We can also take gigs at pretty massive festivals because I know we don’t have to worry about hauling solution.  At only $.50 a gallon plus the cost of detergent it’s a pretty economical choice too. 

Bubble on!  

Open post

Pro Talk: Choosing the Right Bubble Poles

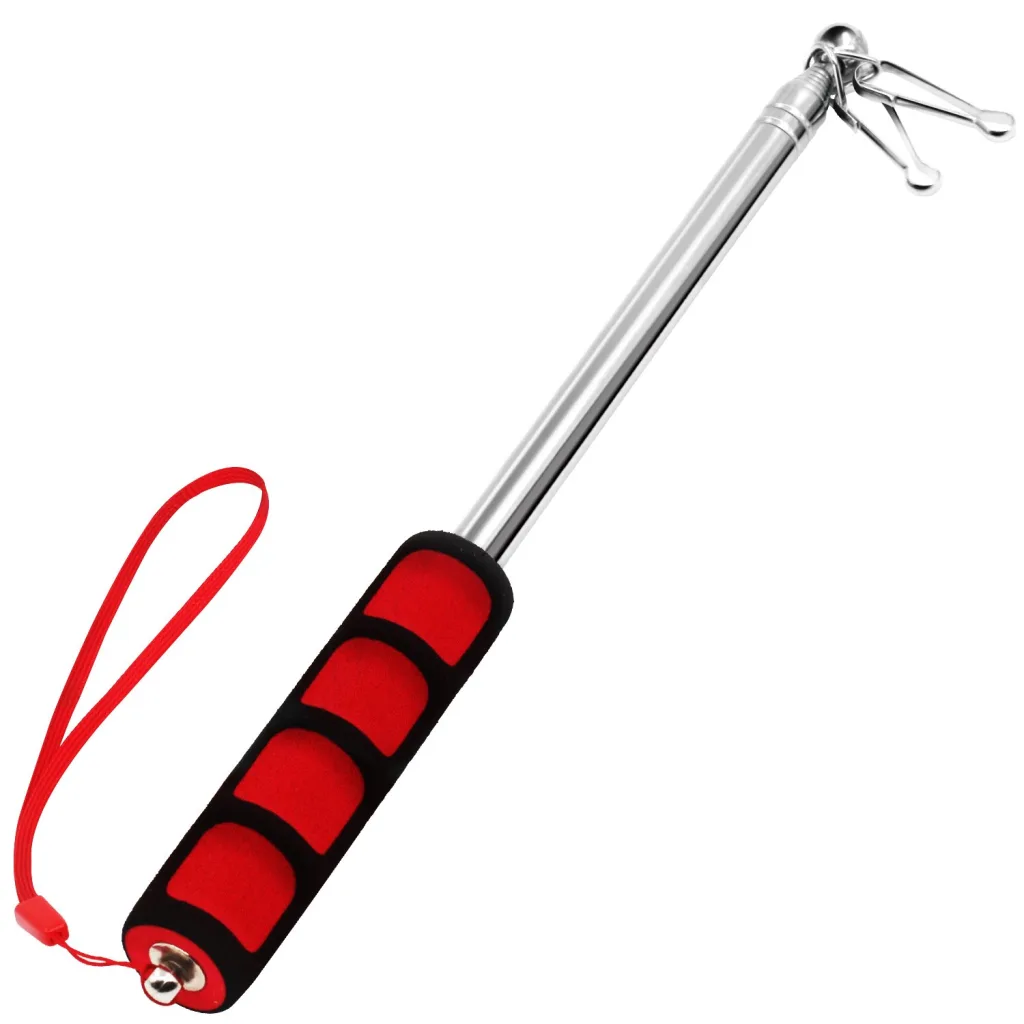
One of the most common questions we get is:
“What’s the best pole to use for bubble wands?”

The answer? It depends! There’s no one-size-fits-all solution when it comes to bubble poles. The best choice depends on your event, the type of bubble gear you’re using, and even the weather conditions.

Here’s a breakdown of the three main types of poles and their pros and cons to help you decide what’s right for you.


🎣 Telescoping Fishing Poles

Pros:
✅ Lightweight & Long – These poles are impressively long, allowing you to launch bubbles high into the air and over crowds.
✅ Perfect for Large Garlands & Nets – If you’re using bigger rigs, these poles can handle the weight and size with ease.
✅ Visually Impressive – The length and reach give a “wow” factor that’s hard to beat!

Cons:
❗ Need to be Set Up – They’re not difficult to setup, but they take a few minutes of work. (scroll-down for a how-to-video)
❗ Too Long for Small Spaces – If you’re working in a small backyard or tight area, these poles can be cumbersome.
❗ Challenging to Dip – Due to their length, they can be harder to dip in bubble solution without splashing or missing the bucket.
❗ More Expensive – At $10-$20 per pole (or more if pre-rigged), they’re the most expensive option.

Recommended poles:

Black Widow Telescoping Fishing Poles– these are very basic, and do not have any sort of a grip, but you can find them pretty easily at your local Walmart. We recommend using some hockey tape for a better grip. Removing the last section makes a pole that is 82 inches long

Slab Grabber Telescopic Fishing Poles– very nice handles, and sturdier at the top, but a foot shorter. They’re slightly more expensive than the Black Widows, but worth it in our opinion. We use the 12-foot version with the last 2 sections removed to make poles that are approximately 74 inches long.

There are quite a few ways to rig them- we like using wall anchors with screw eyes. The Slab Grabber uses #8-#14 anchors, and 1-17/32 screw eyes (National Hardware stock number N118-927), and the Black Widows use #4-#10 wall anchors with 1-1/8 screw eyes (National Hardware stock number N118-927). Your best bet is to go to an independent hardware store with the poles to make sure they fit.

Scroll down for a how-to-video

That idea came from Cheryl Holley at Bubbly Heaven

🚩 Telescoping Flag Poles

Pros:
✅ Lightweight & Compact – Easy to carry, store, and transport.
✅ Adjustable Length – The variable size makes them ideal for different event spaces and crowds.
✅ Easy to Set Up – Quick to rig and get ready for action.
✅ Affordable – Typically priced at $5-$10 per pole, making them a budget-friendly option.

Cons:
❗ Prone to Rust – They need to be dried thoroughly between uses to prevent rusting.
❗ Not Suitable for Large Rigs – While great for smaller garlands, they’re not built to handle large nets or heavy garlands. The 21 loop tri-garland is the largest garland that we recommend using with these poles. They’re too light-weight for our nets.
❗ Less Comfortable Grip – Holding these poles for long periods can be tiring because they aren’t as ergonomically designed.


🧹 Dowels & Broom Handles

Pros:
✅ Beginner-Friendly – Simple and easy for kids and adults alike to use.
✅ Inexpensive – A low-cost option, allowing you to have multiple poles for different strings without breaking the bank.
✅ Durable – They can take a beating and still perform well.

Cons:
❗ Shorter Length – They’re typically too short for making giant bubbles with big garlands and nets. They’re good with garlands approximately 5-6 feet in length
❗ Non-Telescoping – Unlike fishing or flag poles, they don’t adjust in length.

💡 Pro or Con? – Since bubbles stay closer to the ground, they’re easier for kids to pop—which can be either a bonus or a challenge depending on your goal!

The Dollar Tree broom handles can be slippery- we recommend adding some hockey tape at the end for a better grip. Hockey tape is available at Walmart, most sporting goods stores, or online.


🎉 Which Poles Do We Use?

We use all three types!

Because we often perform at day-long or multi-day events with lots of bubble stations for kids, it’s essential to be prepared for any situation. Different conditions call for different setups, so having a variety of poles gives us the flexibility we need to keep the fun going.

That said, about 90% of our rigs are set up with shorter poles. Why?

👉 Less Fatigue – When you’re working 8-10 hour days over a holiday weekend, shorter poles with smaller garlands are much easier on the arms and shoulders. Because they’re easier to dip I find that I can make as many, or more bubbles for kids with the shorter poles than I can with the longer poles.
👉 Beginner-Friendly – Shorter poles are perfect for older kids and parents who want to join in. It’s fun for everyone!
👉 Great for Group Games – We love creating “doubles bubbles” with two kids, and our nets or garlands. We hand a pole to each kid and they run through a field with a group of kids trailing behind popping the bubbles. It’s pure joy!


🛒 Final Thoughts: Which Pole is Best for You?

    • For big, impressive bubbles: Go with telescoping fishing poles.
    • For flexibility and easy storage: Try telescoping flag poles.
    • For quick, simple setups and all-ages fun: Stick with dowels or broom handles.

No matter which pole you choose, you’re guaranteed to create magical moments with bubbles. So grab your poles, dip your strings, and let the fun begin! ✨

Open post

Pro Talk: Big Bubble Blend Technical Info

Big Bubble Blend Tech Info for Professionals

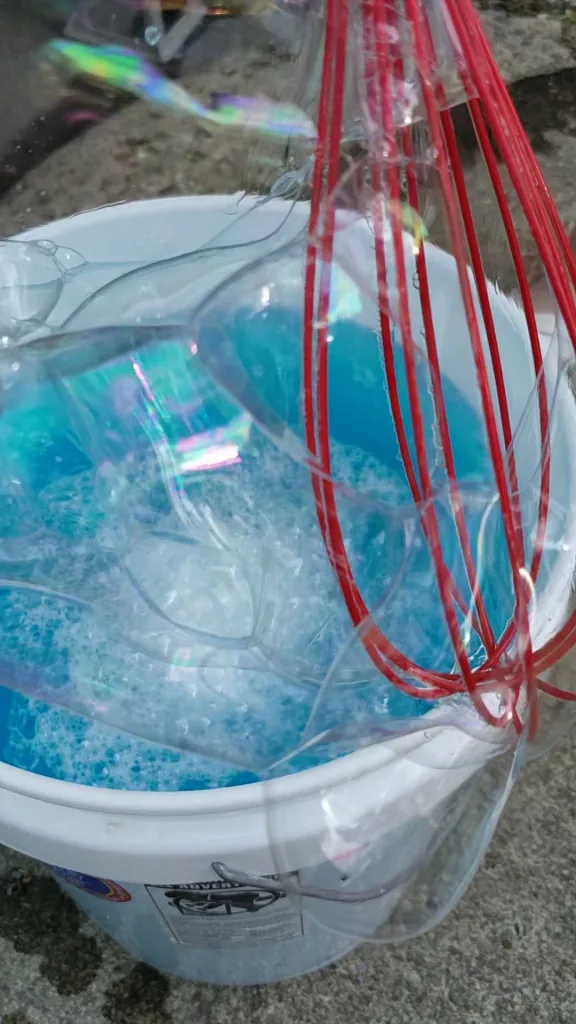
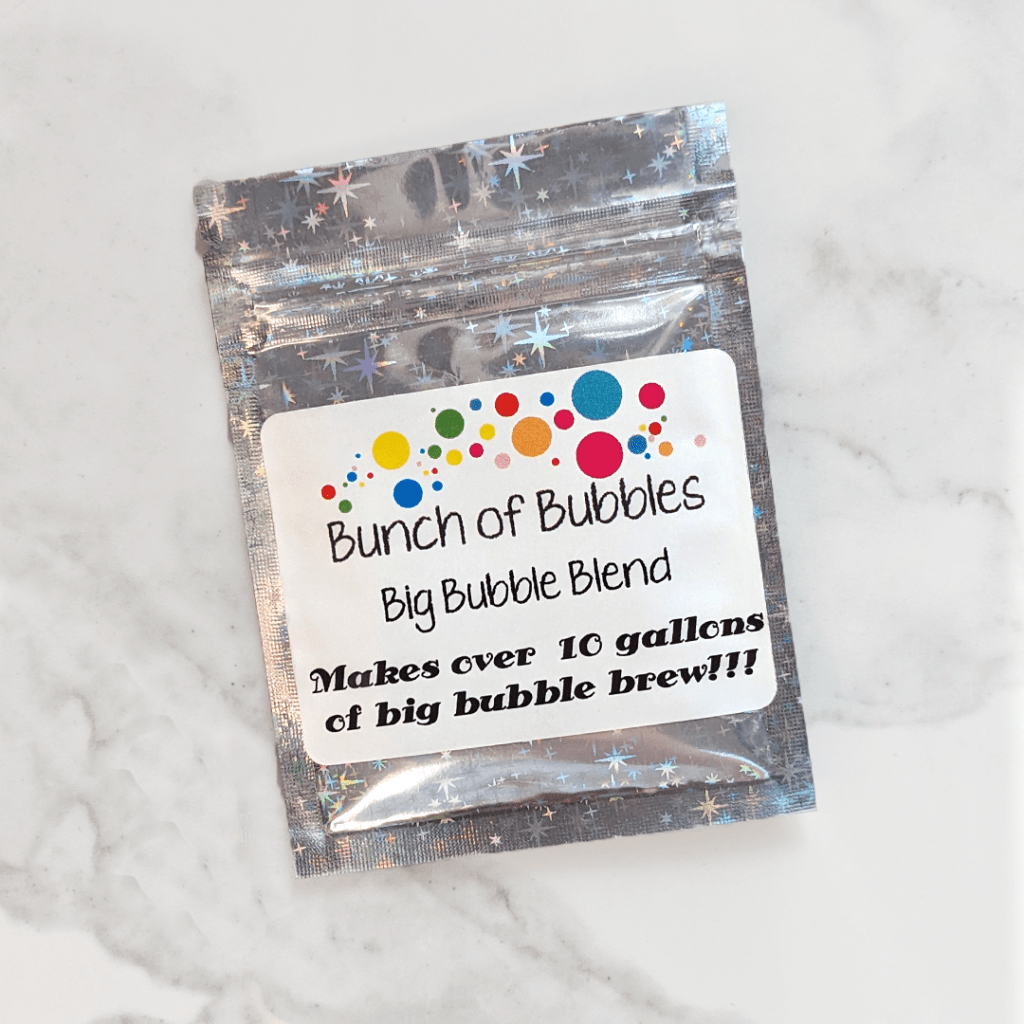
The Big Bubble Blend is a concentrated blend of guar gum, and a cosmetic-grade PEG/PEO. For outdoor bubbles we like this formula:

1 gallon of tap water
1/4 tsp Big Bubble Blend
1 cup of Dawn

You can also use 3/4 cup Dawn Platinum with a tiny bit more bubble powder. The Platinum uses a water conditioner so it tends to foam more, but the colors are a little more vibrant.

We don’t have any tech data using other types of dish soap like Dawn Pro, or Fairy. If you come up with a workable mix using another detergent we are happy to post about it! P&G seems to have changed the formula of Dawn Professional, and we’ve heard mixed reviews. It’s tougher to source, so we have made the Big Bubble Blend to work with more commonly available detergents.

Scaled Recipe for larger batches

4 gallons of water- on a “drywall bucket” it’s just under the ridge where the handles attach
1 tsp Big Bubble Blend
4 cups Dawn (we use a graduated water bottle with a lid for measuring on-site- it’s a little less messy)

It’s our tried-and-true formula, that we use in bubble stations, nets, garlands, and to make moderately big bubbles.

Feel free to experiment with it in your existing formulas, or use it to fine-tune or tweak existing recipes. If you’re having one of those days where things aren’t working quite right you can add a little in your existing solution to see if that helps.

Usage amounts– 1/4 tsp of the Big Bubble Blend (BBB) is roughly equivalent to 2-3 teaspoons of Jlube, or 1 teaspoon of guar gum if you are letting it hydrate overnight. The benefit of using Big Bubble Blend is that it’s ready to use right away, so you can mix it on-site, and it’s more economical than using J-lube. 1/4 tsp of BBB weighs .8-.9 grams if you like using a scale, but the whole point of this formula was to make something that didn’t require any special equipment to make a decent bubble solution.

Compatability with other bubble ingredients– It should work in pretty much every recipe where you would use Jlube or guar. Big Bubble Blend is non-ionic so it’s compatible with most surfactant blends.

You should be able to add glycerin, or baking powder, baking soda, or citric acid with no trouble if those are ingredients you like to work with in your recipes. A 1/4 tsp of sodium citrate per gallon helps make the colors a bit bolder, but the mixture foams easier. Big changes in the pH may affect the hydration rate. The manufacturer’s tech data for the PEG says the maximum hydration time is 2 hours at a pH of 7. In our experiments it’s about 90% hydrated within 5-10 minutes, and it’s calibrated so that you can use it without needing to wait.

I tried a lot of different humectants like glycerin, sorbitol, panthenol, and even hyaluronic acid, and for outside bubbles I just didn’t see any huge improvements.

Shear Mixing– When we disperse thickeners in the cosmetics lab we sometimes use what they call “high shear” mixing with a blender, or immersion blender. Don’t do that with the Big Bubble Blend. It’s not what we call “shear tolerant”. A whisk is ideal, but a small hand mixer, or a paint mixing “squirrel” are fine if you’re not mixing it for a long time.

The ingredients were chosen because they disperse, and hydrate with pretty minimal mixing in cold water, and you shouldn’t need any special tools. It can get a little clumpy in hot water. If you’re using hot water because it’s cold outside sprinkle it in, and whisk as you go.

Shelf life– the powder itself lasts 6-9 months at room temperature, and longer if you store it in the freezer. If it’s older than that it may be weaker. You can use a little more to use up the pack.

As a mixed bubble solution, it’s ok for a day or two if all of your mixing equipment, and strings are clean, but we recommend mixing it fresh as close to show time as possible.

Make sure you firmly reseal the package to prevent contamination. There aren’t any additional preservatives in the BBB so it won’t prolong your shelf life of mixed solution. It’s made to be mixed fresh before bubble sessions.

Can I slurry it with the detergent? It’s made to be hydrated in water. It gets pretty clumpy, and it’s tougher to mix in with the detergent. It’s also an unpreserved powder, and could throw off the preservative load of the detergent making the mix susceptible to microbial growth if you’re trying to store a slurry for several days or weeks. You’re not really saving any time or effort, or getting better results by making a slurry, and it’s not worth the risk in our opinion.

A huge THANK YOU goes out to everyone who’s contributed to the Soap Bubble Wiki, and bubbling communities This powder would not have turned out as well if it weren’t for the immense amount of information that people have posted, and a lot of support from the communities over the years. We truly appreciate it!

Open post

How to use Big Bubble Powder

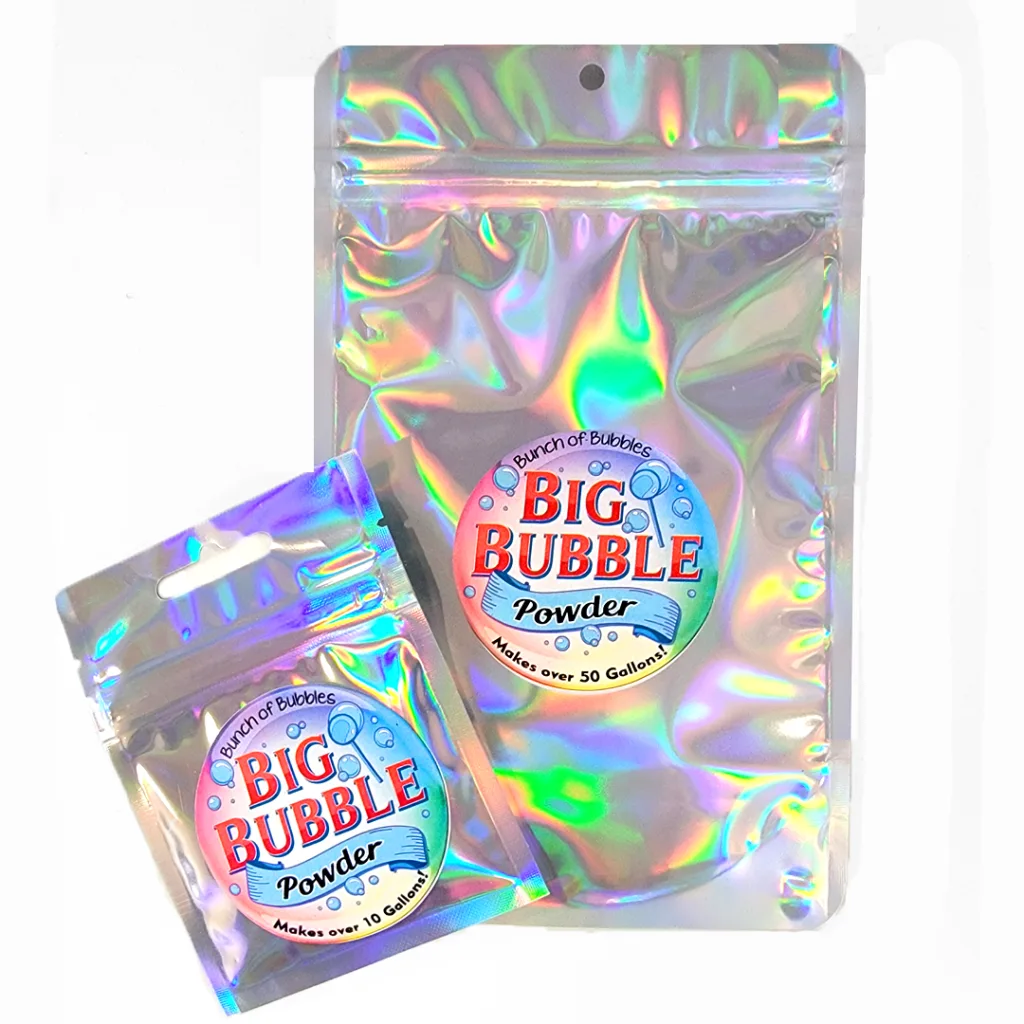
Big Bubble Powder is a special blend of guar gum, and a cosmetic grade polymer that lets you make HUGE bubbles!  The polymers let bubbles stretch much larger than they would with just detergent, or with regular additives like glycerin, or corn syrup.  This is our tried-and-true recipe that we’ve tinkered with to get *just right*.

To make a gallon of bubble solution:

Add one gallon of tap water to a bucket, and sprinkle 1/4 tsp of the bubble powder on top.  Whisk it to combine in the water.

Add 1 cup of Dawn, or 3/4 cup Dawn Platinum, stir gently to combine, and you’re all set!

The name brand Dawn products work the best. We had almost no luck with Great Value Brand detergent even if we used a lot more of it.

Safety:

  • Please use water safety precautions if you are using bubble solution with small children. Do not leave them unattended around open buckets.
  • Big Bubble powder is essentially non-toxic.  Guar gum is used in lots of different foods, and the one that we use is organic, and non-gmo.  The other ingredient is a polymer a cosmetic grade ingredient called polyethylene glycol- it’s what makes the lubricating strips on razors.  It’s very slippery, and slimy when mixed with water. 
  • If you’re handling a lot of bubble solution it can be drying to the skin because the pH of the detergent is usually pretty high.  We recommend using a good lotion, or rubber gloves to protect your skin if you’re doing a lot of hand bubbling.
  • Bubble Solution doesn’t stain clothes, but rinsing your hands, taking a bath, or running through the hose after you’re bubbled-out for the day is recommended.
  • Mixed bubble solution is safe for a day or two, but does spoil quickly in warm weather. Mix it as needed for best results.
  • Store unused Big Bubble Powder in the freezer for maximum freshness.
  • Dispose of any unused bubble solution down the drain. 
Happy Bubbling!